
How to Care for New Fruit Trees in Summer: A Practical Guide for SF East Bay Gardeners
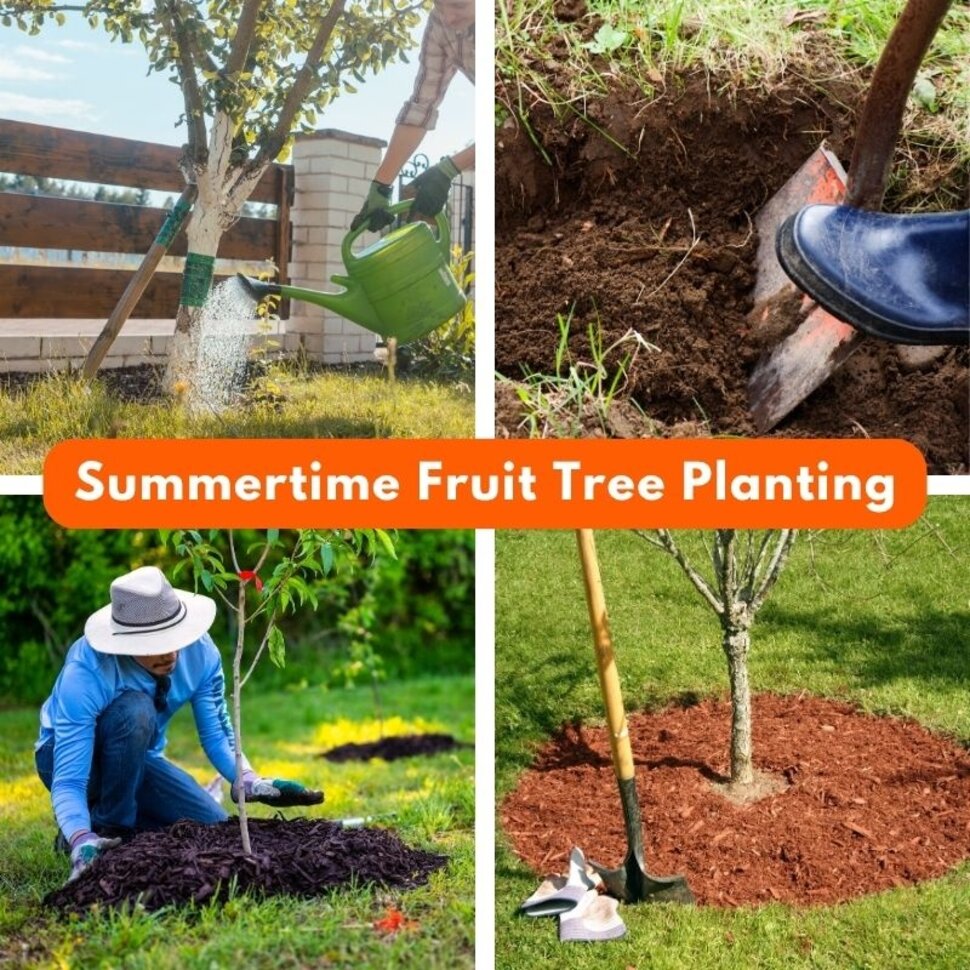
While late winter and early spring are the optimal time for planting fruit trees, summer plantings can absolutely succeed with the right care. Container-grown trees in 5- or 15-gallon pots can go in the ground any time of year. The keys are correct planting conditions, good drainage, optimized watering, and close monitoring during the first 60 days.
Our practical guide gives East Bay gardeners in cities like Oakland, San Leandro, Hayward, Castro Valley, Alameda, and San Lorenzo, the right information to transplant and care for a new fruit tree successfully during the warm season. We cover every step from site selection to summer pest management, and give you the extra summertime guidance that most generic planting guides skip.
Why Summer Planting Requires Extra Care
Container-grown trees — the kind we sell in 5-gallon or 15-gallon black nursery pots — can be transplanted any time of year. That's one of their big advantages over bare-root trees, which should truly only go in the ground in late winter while they are still fully dormant.
But container trees planted in summer face real challenges: high temperatures, low humidity, intense sun on newly exposed root zones, and the absence of cool, root-building weather. The tree is actively growing and transpiring water through its leaves at the same moment its roots are trying to recover from transplant disturbance.
The good news is that our East Bay climate mitigates a lot of these conditions. The coastal influence of morning fog and afternoon marine air mean that San Leandro, Alameda, Oakland and other bayside cities tend to have gentler summer conditions than inland areas. Castro Valley and Hayward sit a bit further from the Bay and can run a little hotter. Knowing your specific microclimate matters.
The bottom line: summer planting is doable and it rewards attentiveness. Plan to check on your new tree more frequently in its first 60 days. Treat it gently and it will be producing fruit for years to come.
Site Selection: Setting Your Tree Up for Life
Sun
Fruit trees need sun — and a lot of it. We agree with the UC Master Gardeners of Alameda County and recommend that fruit trees receive at least 6 hours, but preferably 8, of direct sun per day during the growing season. This is especially true for Mediterranean fruits like Figs and Pomegranates, which like 8-10 hours.
South- or west-facing spots that catch afternoon sun and store warmth tend to produce better fruit quality, especially for peaches, nectarines, and apricots.
Avoid planting under or near large trees that will cast shade as the season progresses. Even a few lost hours of sun daily will reduce fruit production significantly over time.
Drainage
This element is non-negotiable. Fruit trees planted in poorly draining soil will decline and die — often from root rot before you even realize what's happening. Before you dig, do the drainage test recommended by our longtime supplier Dave Wilson Nursery, the leading wholesale fruit tree grower for California home orchards:
- Dig a large hole about 12 inches deep.
- Fill it with water and let it drain completely.
- Fill it again and time how long it takes to drain.
- If the water is still sitting after 3 to 4 hours, you have a drainage issue that needs addressing before you plant.
If your soil drains poorly, your options are: 1) choose a different spot; or 2) build a raised berm or mound 6 to 12 inches high and at least 3 feet wide; or 3) install a French drain (which is not super practical for most gardeners, but don't let that stop you).
Do not simply amend the hole and hope for the best. A perfectly amended hole surrounded by slow-draining clay will still act like a bathtub and slowly drown the tree's roots.
Spacing and Layout
If you're planting a single tree, standard spacing recommendations apply — most full-size trees need 15 to 20 feet of clearance. But if you use Dave Wilson's Backyard Orchard Culture approach, which is very well suited to the smaller yards common in the East Bay, you can plant multiple semi-dwarf varieties closer together and manage their size through regular summer pruning. This gives you more fruit over a longer season from a very small footprint.
Soil Preparation: What to Amend and What to Skip
East Bay soils vary a lot. The Oakland hills and Castro Valley can have heavy clay. San Leandro and Hayward flatlands have denser, compacted soils in many neighborhoods, often with clay. Looser, sandier soils do exist, particularly in some Alameda neighborhoods, but they tend to be the exception.
The key principle is this: don't over-amend the planting hole. A beautiful, fluffy planting hole with a lot of organic matter that is surrounded by dense native soil can become a drainage sump. Instead:
- If your native soil has decent drainage, backfill with a blend of your native soil and AT LEAST 20% coarse aggregate such as perlite, vermiculite, volcanic pumice, or scoria.
- In clay-heavy soils, you must add MORE THAN 20% coarse aggregate such as E.B. Stone Volcanic Pumice, perlite, vermiculuatie, or scoria to the mix to improve aeration and drainage. Do not use bark or wood chips.
- In sandy soils, add organic matter to aid moisture retention in the root zone during dry summer months. Sources include compost, peat moss, coco coir, and mini wood chips.
- Do not add fertilizer directly into the planting hole. It can burn tender new roots and set back your tree’s establishment.
Pro tip: Too much drainage is FAR better than not enough. When in doubt, amend with coarse aggregate. The tree will establish and grow much faster.
How to Plant Your New Fruit Tree
Follow these steps carefully for a successful fruit tree transplant:
- Dig a large hole that is at least twice the size of the root ball.
- Mix the soil extracted from the hole with coarse aggregate (perlite, vermiculite, volcanic pumice, or volcanic rock also called scoria) that is AT LEAST 20% by volume. Make sure the native soil and the aggregate are well mixed.
- Put AT LEAST 6 inches of this mix at the bottom of the hole so it is underneath the root ball.
- Remove the tree from its container gently. Disturb the root ball as little as possible. If the tree is root-bound (roots circling the pot), gently loosen them before planting.
- Place your fruit tree in the hole, then use a long tool handle laid across the hole to help verify that your tree is at the correct height. Make adjustments to your planting hole as needed.
- Now fill in around the edges with the soil and aggregate mix tamping gently as you go to remove air pockets. Do not pack it hard.
- Do not bury the crown, which you will see at the top of the root ball. It is where the trunk flares slightly as it meets the roots. It should sit right at, or slightly above, the surrounding soil level.
- Water deeply after planting to settle the soil around the roots. Tamp gently to remove air pockets, then add additional soil if needed.
- Apply mulch right away — see below for how and why.
Pro tip: After planting, generously saturate the root ball and surrounding soil. Apply water slowly and over a longer period of time for best penetration. Do not irrigate again until the top 1 to 2 inches of the root ball have become dry.
Mulching: Your Summertime Secret Weapon
In summer, mulch is one of the single most effective things you can do for a newly planted tree. A 3- to 4-inch layer of organic mulch — wood chips, shredded bark, or even straw — applied in a wide ring around the tree does three things at once:
- Moderates soil temperature, keeping roots cooler on hot days.
- Retains soil moisture, reducing how often you need to water.
- Breaks down over time, feeding the soil and improving its structure.
Apply mulch in a wide ring that is at least 3 feet in diameter and extend it out to the edge of the tree’s canopy if possible. This is called the “drip line” because any water dripping from the leaves falls at this boundary and the tree's roots zone will expand outwards seeking this moisture.
Keep mulch 4 to 6 inches AWAY from the trunk. A "mulch volcano" piled against the bark holds moisture against the trunk and creates conditions for rot and fungal problems. Instead, think of your ideal shape as a "mulch donut", not a mound.
Replenish mulch as needed throughout the season. In our dry East Bay summers, you'll likely notice it compressing and thinning by late July or August.
Watering Your New Fruit Tree in Summer
Water is the most critical factor for a summer-planted tree. Get this right and your tree has a strong chance at thriving. Get it wrong in either direction — too much or too little — and you'll have problems.
General Principles
The goal is consistent, moderate moisture in the root zone. You are aiming for soil that feels like a moist sponge. You don’t want dry and crumbly texture and it should never be soggy and saturated.
Deep, infrequent watering at ground level is better than frequent shallow irrigation. It encourages roots to grow deeper into the soil, which makes the tree more drought-resilient over time.
Do not spray your fruit tree from above with a hose nozzle as a form of irrigation as it may contribute to disease conditions.
First 8 Weeks: Your New Transplant
For the first 2 months after planting during warm weather, plan to water 2 to 3 times per week, depending on temperatures and your soil type. Sandy, faster-draining soils will need more frequent attention than clay soils.
Before watering, check soil moisture by pushing your finger or a wood dowel 3 to 4 inches into the soil in two places: 1) near and around the outer drip line where the tree's canopy ends; and 2) in the root ball area, which can sometimes be dry even when the surrounding area is wet. This can happen if a tree was in a pot for a very long time.
If you find damp conditions in both the root ball and the drip line, hold off on watering. If both areas are dry, then water deeply. If only the root ball is dry, water carefully and slowly staying close to the tree trunk.
After Establishment
Once the tree shows signs of active new growth — a reliable sign that roots are working — you can taper watering to once or twice per week. Regular irrigation is one of the two keys to successful fruit production (the other being sun).
Don't assume that the tree can fend for itself after a month or two. Most fruit trees, even established ones, need supplemental irrigation through our dry summer and fall seasons.
Remember to monitor the soil moisture as the seasons shift. Do not "set and forget" your irrigation if you decide to rely on automatic systems—especially when it is for a fruit tree.
Heat Spikes
When temperatures in your neighborhood push above 90°F — which can happen in Castro Valley, Hayward, and the inland portions of Oakland and San Leandro — increase watering frequency. Young trees can show wilt within hours of heat exposure.
If your tree drops leaves dramatically after a heat spike, assess soil moisture, give it a deep drink, and watch for recovery. Some leaf drop during or after intense heat stress is normal.
Extra Care: Protecting Your New Tree from Heat Stress
Sunburn and Bark Scald
Generally, the fruit trees in our outdoor nursery are accustomed to full sunlight before they go home with you. But young trees do have thinner bark — especially peaches, nectarines, and cherries — so they may still be vulnerable to sunburn on their trunks and scaffold branches when first planted. Symptoms include discolored, cracked, or sunken bark on the south or west side of the trunk.
If you are in a microclimate that regularly spikes over 90 degrees, you may wish to wrap the lower trunk with a light-colored tree wrap or paint exposed bark once with diluted white latex paint (50/50 with water). Alternatively, you can temporarily rig a piece of shade cloth on the sunny side of the tree for the first few weeks. As the canopy fills out and the bark toughens, the tree will become less vulnerable and you can remove the shade cloth.
Acclimation Before Planting
Our fruit trees have lived in their nursery pots for several months in daily sunshine plus several rainstorms and a heat advisory, so they will probably not need a lengthy adjustment period. However, there is no downside to waiting a few days or even a week after you bring your tree home to acclimate it to your garden’s unique conditions, especially if you are still determining exactly where to plant it.
Hold Off on Fertilizing
Do not fertilize a newly transplanted tree during its first summer. The tree's energy in the first months should go entirely toward root establishment, not top growth. Fertilizer pushes new leaf and shoot growth that the root system isn't yet equipped to support. Plan to begin a regular feeding schedule the following spring, once the tree is well established and actively growing.
Summer & Fall Pest and Disease Management in the East Bay
The SF East Bay has a mild, Mediterranean climate that most fruit trees love — but it also creates conditions where specific pests and diseases thrive. Here's what to watch for and how to respond, following the principles of Integrated Pest Management (IPM): start with the least disruptive interventions, monitor regularly, and use targeted treatments only when necessary.
If you’re not sure what sort of pest or disease you’re looking at, snap some photos and email them to our Help Desk. Better yet, put a sample in a zip lock bag and bring it to us at the nursery for diagnosis and treatment recommendations.
Peach Leaf Curl
This fungal disease (Taphrina deformans) causes the distinctive puckered, reddish, distorted new leaves on peaches and nectarines in spring. By the time you notice it in summer, the infection has already occurred. The only effective management window is a single dormant-season spray with a fixed copper and/or fungicide spray applied in winter, after leaves drop but before new growth emerges.
If you see leaf curl this summer on a newly planted tree, note it and schedule two treatments of dormant spraying on your calendar this coming winter. The tree will drop the affected leaves and produce a second flush of healthy growth. This does not usually kill young trees, though it does weaken them.
Brown Rot
Brown rot (Monilinia fructicola) is the most common and damaging stone fruit disease in our area, causing fruit to quickly decay on the tree or in storage, especially during warm, humid weather near harvest.
Prevention is key: remove mummified fruit and dead wood, thin fruit to improve air circulation, and avoid wetting fruit with overhead irrigation. If brown rot is chronic in your garden, a preventive fungicide spray (copper or sulfur-based) at bloom time the following spring helps protect against infection.
Codling Moth
If you grow apples or pears, codling moth is the pest most likely to ruin your harvest. The larvae bore into developing fruit, leaving the characteristic "wormy apple."
Pheromone traps are useful for monitoring when adult moths are flying. Kaolin clay sprays applied to young fruit are an organic and effective barrier method. Spinosad-based organic sprays, timed to egg hatch, are also effective. Consistency matters more than any single treatment — codling moth management is a season-long commitment.
Spider Mites
Spider mites thrive in hot, dry conditions — exactly what East Bay summers can deliver. Look for stippled, bronzy-looking foliage, fine webbing on the undersides of leaves, and overall dullness to the canopy. A strong blast of water from a hose dislodges most mite populations effectively.
If an infestation is established, insecticidal soap or neem oil applied in the cooler parts of the day (early morning or evening) are effective and low-impact options. Avoid broad-spectrum pesticides, which kill off the beneficial predatory mites that naturally keep spider mite populations in check.
Scale Insects
Scale — both armored and soft varieties — can infest a range of fruit trees. They appear as small, flat, waxy bumps along stems and branches. Serious infestations weaken trees and produce sticky honeydew that encourages sooty mold.
Horticultural oil sprays during the dormant season are the most effective treatment. During the growing season, insecticidal soap handles crawlers (the mobile juvenile stage). Natural predators such as parasitic wasps and lady beetles provide meaningful biological control as long as broad-spectrum pesticides are not used.
Spotted Wing Drosophila
SWD is a small vinegar fly that, unlike native fruit flies, lays eggs inside intact, ripening fruit. It's particularly damaging to thin-skinned fruits like cherries, figs, plums, and pluots.
Harvest fruit as soon as it's ripe because this pest’s pressure increases as fruit softens. Remove fallen and overripe fruit promptly. Exclusion netting is the most effective organic protection for high-value crops. Monitoring with red-sphere traps helps track population levels.
Aphids
Aphids cluster on new growth and are common on stone fruits, apples, and pears in spring and early summer. A strong blast of water handles most light infestations. Insecticidal soap is effective for heavier pressure.
Encourage beneficial insects — ladybugs, lacewings, parasitic wasps — by planting nectar-rich flowers nearby and avoiding broad spectrum insecticidal sprays. You can also purchase these hard working insects and release them into your garden in the early evening. Aphid populations generally decline on their own as natural predators build up through summer.
Fire Blight
Fire blight (Erwinia amylovora) is a bacterial disease that primarily affects apples and pears, causing shoots to turn grey, then black, then droop in a distinctive "shepherd's crook" shape. It spreads rapidly during warm, wet spring weather.
Prune out infected wood immediately, cutting 8 to 12 inches below visible symptoms into healthy wood. Sterilize pruning tools between every cut with a 10% bleach solution or 70% isopropyl alcohol. Copper-based sprays at bloom time provide some preventive protection. Choose fire-blight-resistant apple and pear varieties when possible.
Summer Pruning: Keeping Your Tree the Right Size
For newly planted trees in their first summer, zero pruning is best. If necessary, remove any dead, broken, or diseased wood, and any shoots that are crossing or crowding the interior.
Starting next year, after your fruit tree is established, a light summer pruning is a powerful tool for size control. Most gardeners are familiar with winter pruning, but summer pruning keeps the tree’s size manageable without the aggressive regrowth response that winter pruning usually triggers.
This is the approach recommended by Dave Wilson Nursery's Backyard Orchard Culture system, which optimizes fruit tree cultivation in smaller yards. Pruning lightly after summer harvest keeps the canopy open, improves air circulation (which reduces disease pressure), and sets up the tree for better fruit production in the following spring season.
Fruit Thinning: Less Fruit, Better Fruit
Young trees set more fruit than they can successfully carry to maturity. This overcrowding leads to small fruit size, branch breakage under the weight of the crop, and exhaustion of the tree that can result in poor production the following year.
For young, newly planted trees, consider removing all of the fruit entirely to let the tree direct all of its energy toward root and structure development. You'll get better harvests sooner by being patient now.
Heading Into Fall: What to Do Next
For fruit trees planted in summer, fall is when the roots are doing their best work thanks to cooler temperatures. Keep watering through the fall months until significant rain patterns arrive. This is usually late November or December for the East Bay area.
As the days shorten in autumn, your fruit tree will begin to slow its growth and transition toward winter dormancy. This is actually a good time to:
- Apply a layer of organic compost followed by a fresh layer of mulch.
- Check for and remove any immature fruit remaining on the tree or on the ground, which can harbor brown rot and codling moth pupae overwinter.
- Remove and dispose of fallen leaves if any disease was present during the season, rather than composting them.
- Set reminders for two rounds of dormant winter spraying using OMRI listed products like Fertilome’s Horticultural Oil and Copper Fungicide to address pest and disease issues before they re-emerge next spring.
Come See Us at Evergreen Nursery
Visit our San Leandro garden center seven days a week from 9:30 am to 5:30 pm. Our staff can help you choose the right fruit tree for your space and growing conditions, recommend appropriate products for your soil conditions, and answer specific questions for your garden.
This article was written by the staff at Evergreen Nursery in San Leandro, California. We have been helping East Bay gardeners grow food and care for their outdoor spaces for over 40 years. Our team includes experienced horticulturalists and lifelong gardeners with deep knowledge of Alameda County's growing conditions.
Frequently Asked Questions
Can I plant a fruit tree in summer in the SF East Bay?
Yes. Container-grown fruit trees in 5- or 15-gallon nursery pots can be planted any time of year. Summer planting requires extra attention to watering and mulching, but it absolutely succeeds with the right care. Our mild coastal climate — especially in cities like San Leandro, Oakland, and Alameda — makes the East Bay more forgiving for summer planting than hotter inland regions.
How often should I water a newly planted fruit tree in summer?
For the first 60 days, plan to water 2 to 3 times per week depending on temperatures and soil type. Before each watering, push a finger or wooden dowel 3 to 4 inches into the soil in 2 places: 1) in the root ball area; and 2) near the drip line. Damp in both places means hold off. Dry in both places means water now. Dry in the root ball area, means water near the trunk carefully and slowly. Once the tree shows active new growth, you should be able to taper to once or twice per week depending on weather conditions.
What fruit trees grow well in Alameda County?
Our climate requires low-chill hour varieties that don't need long cold winters to produce fruit. Good performers in Alameda County include low-chill apples, peaches, nectarines, plums, pluots, figs, persimmons, pomegranates, and pineapple guava. All of the varieties we carry at Evergreen Nursery have been selected specifically for our local growing conditions.
Do I need two fruit trees for pollination?
Most fruit trees we carry are self-fertile, meaning a single tree will produce fruit on its own. The exceptions are Pluot and Pluerry, both of which require a compatible pollinizing tree nearby for reliable fruit set. Ask our staff for current pairing recommendations.
How deep should I mulch around a new fruit tree?
Apply a 3- to 4-inch layer of organic mulch — wood chips, shredded bark, or straw — in a wide ring extending to the drip line of the canopy. Keep mulch 4 to 6 inches away from the trunk to prevent rot. Replenish it as it thins through the dry summer months.
When should I fertilize a newly planted fruit tree?
Do not fertilize during the first summer after planting. The tree's energy needs to go toward root establishment, not new top growth. Begin a regular fertilizing schedule the following spring once the tree is actively growing and well settled in.
Recent articles
View all
Art, Plants & Community: Fall ArtFest at the Nursery Sept 26 & 27
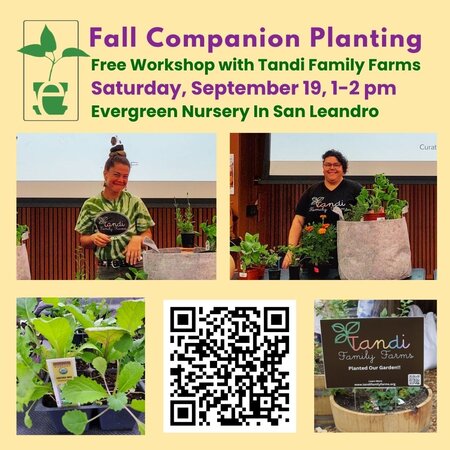
Fall Companion Planting Workshop with Tandi Family Farms